Keeping It Level
A quick guide to anti-slip deck coatings for seniors and aging in place homes: paint versus stain, DIY grit additives versus commercial products, and what actually holds up on wood, composite, and concrete.
- Paint or Stain: The Sticker Versus the Tattoo
- The DIY Additive Method
- When to Go Commercial-Grade on Anti-Slip Deck Coatings for Seniors
- Concrete and Masonry
- Wood: Same Process, Same Rules
- Composite Decking: A Different Set of Rules
- Grip Tape and Mats
- Pool Decks and Wet-Constant Areas
- Don't Forget Where the Eye Needs Help
- Making the Call: Coat It or Replace It?
- FAQ: Anti-slip Deck Coatings for Seniors
- How long does an anti-slip deck coating last?
- Can I put an anti-slip coating on composite decking?
- Is epoxy or acrylic better for a senior's deck or porch?
- Is grip tape or anti-slip paint better?
- Can I use a regular deck sealer and just add grit myself?
- Do anti-slip coatings work on bare feet, or just shoes?
- What's the best anti-slip deck coatings for seniors with a wood deck?
- Bottom Line
“Add some grit to your sealer” only goes so far. Choosing between anti-slip deck coatings for seniors means answering a few bigger questions first. Paint or stain? DIY additive or a dedicated product? What holds up on concrete versus wood versus composite? And what happens when someone skips a step and it fails?
This article is the deep dive. We’re covering the products, the application steps, the mistakes that ruin a good coating, and how to make the right call for your situation. For seniors and their families planning aging in place upgrades, getting this right matters more than most home projects. A slippery deck or porch is one of the biggest fall risks around a house.
I’ve touched on slip resistance in almost every article in this series, because it comes up on nearly every job. This is another piece in our Last Fifty Feet series. I’ve already talked about why traction matters on steps and touched on it in the deck and porch safety article too. This one isn’t about the why anymore. This one is about the how. What you buy, how you apply it, and where I see people mess it up.
Paint or Stain: The Sticker Versus the Tattoo
Before you pick a product, you need to know what you’re choosing between. This decision changes your cost, your maintenance, and how your deck looks when you’re done.
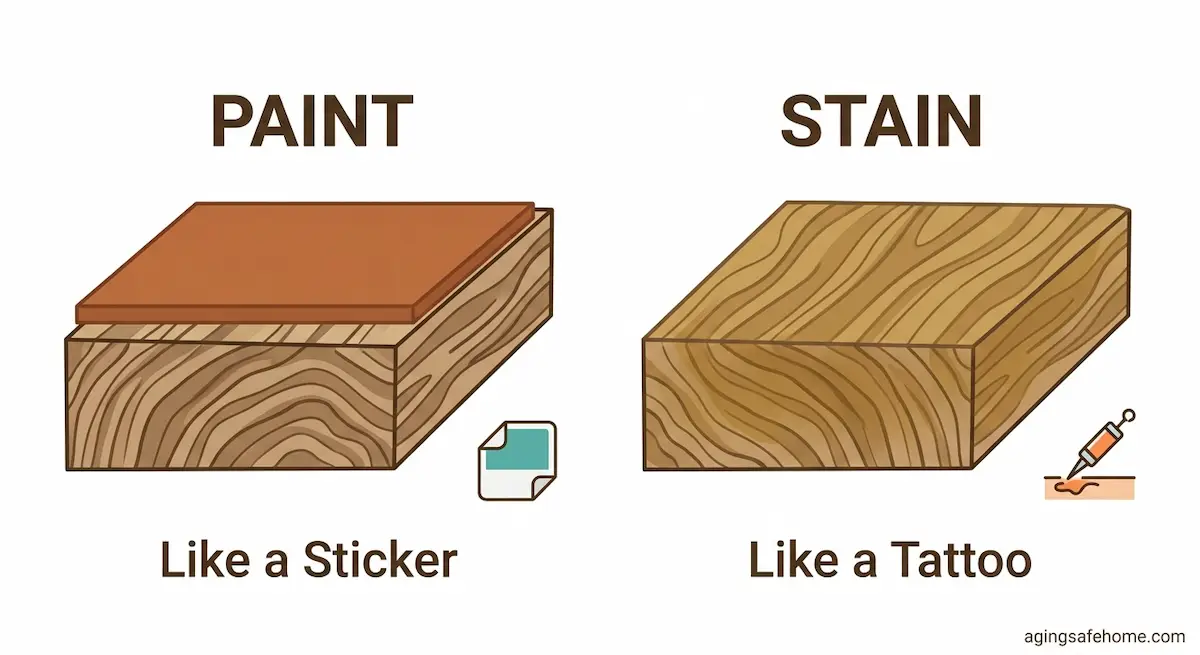
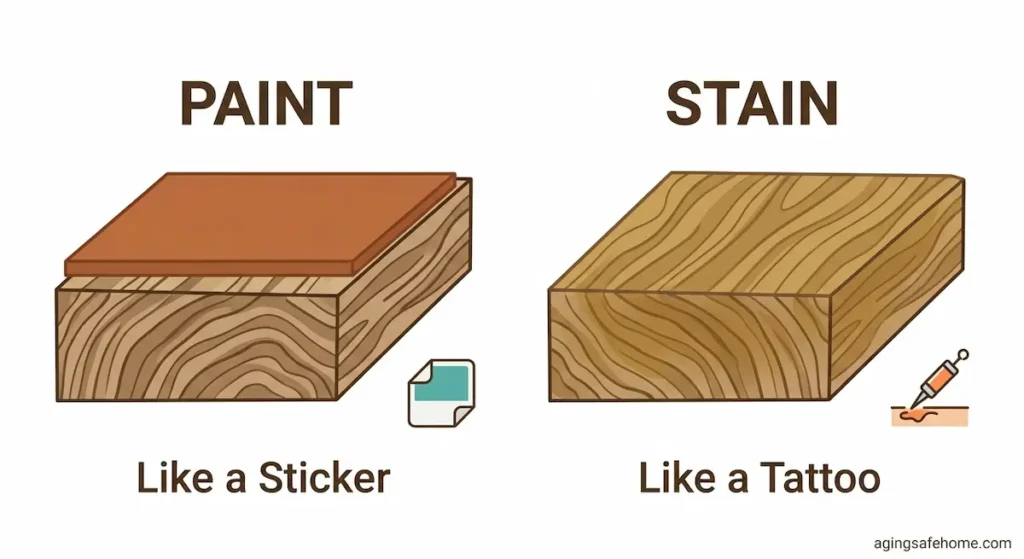
Deck paint lays on top of the wood. It doesn’t soak in. Deck stain actually penetrates into the wood itself. Think of it this way: paint is like a sticker, stain is like a tattoo. One sits on top. One becomes part of the surface underneath it.
That difference drives your three real options for your anti-slip deck coatings for seniors.
Option 1: Deck paint with a built-in anti-slip coating. This is a hard paint, textured, with the traction already built in. Tuff Grip is one I’ve used a lot. Behr, Valspar, and most major paint manufacturers make their own version now too. This is paint, plain and simple. Even though it’s hard and durable, it still sits on top of the wood and hides the grain completely.
Option 2: A solid stain with a built-in anti-slip coating. “Solid stain” is a bit of a misleading name. It technically penetrates the wood, but it’s opaque. No wood grain shows through. It looks essentially like paint once it’s on. A handful of brands offer this with anti-slip built in, and it can be tinted to any color you want.
Option 3: Semi-transparent stain plus a separate anti-slip topcoat. This is the two-part option. It’s for anyone who wants that real stained-wood look, the kind you see in every deck photo online, while still keeping it safe. Pick your semi-transparent stain for color first. Let it fully dry. Then apply a separate anti-slip sealer over the top. I’ve seen a couple of all-in-one products that claim to do both steps at once, but I haven’t used them myself yet, so I can’t personally vouch for them.
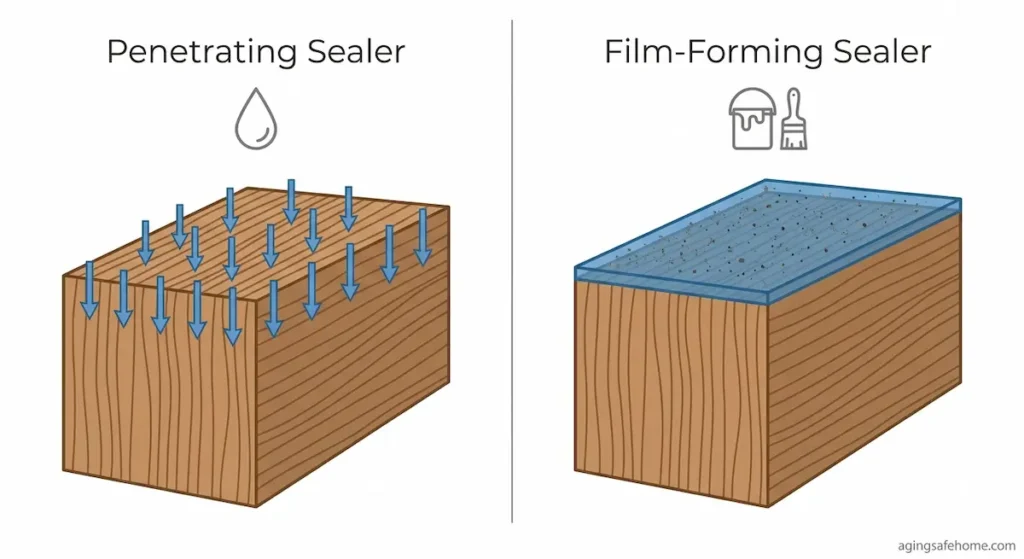
If you go the two-part route and build your own topcoat instead of buying a premade anti-slip sealer, one detail makes or breaks the job: you need a film-forming sealer, not a penetrating one. A penetrating sealer soaks into the wood and won’t hold grit on the surface where you need it. A film-forming sealer, like acrylic or polyurethane, sits on top and builds a layer. That’s what holds the texture. For example, regular Thompson’s Water Seal penetrates the wood, so it won’t work here. Thompson’s Water Seal Heavy Duty Clear Sealer is acrylic based, so it will.
One more warning on this step: a film-forming topcoat needs a compatible surface underneath it. If you put a water-based, film-forming sealer over an old oil-based stain, or over a stain that isn’t compatible with it, the new coat can sheet right off, especially in humid weather. Bare wood is the safest starting point. If you’re coating over an old finish, confirm it’s compatible first, or you may end up redoing the whole job.
The DIY Additive Method
If you’re doing the additive-in-sealer version yourself, two things make the difference between a job that holds up and one that doesn’t.
First, do your initial coat without the grit. Add the grit into the second coat only.
Second, get the sealer right. See above. Acrylic sealer, acrylic deck paint, or a solid stain all work as your base for adding grit. A penetrating sealer doesn’t.
One more thing worth knowing before you buy your grit: not all grit feels the same underfoot. A coarser, heavier grit gives great traction for work boots and shoes, but it can feel rough or even abrasive on bare feet, which matters a lot if seniors in the house are walking out to a pool or stepping onto a porch in slippers. Finer grit options and polymer-based additives tend to feel gentler underfoot while still adding real traction. If bare feet are part of the picture, ask your paint supplier about a finer or softer grit option before you commit to the coarsest one on the shelf. I’ll admit this one didn’t cross my mind until my mother-in-law set me straight. She’s Eastern Kentucky through and through, and in her book, shoes are optional. Trust me, she rarely opts in.
On maintenance: DIY grit additive jobs generally need to be redone every 1 to 2 years. Pre-made commercial all-in-one products are usually rated for 2 to 3 years. Neither is permanent. Grit, tape, mats, paint, all of it wears down over time. The only real variable is how fast.
One thing that can slow that clock down: getting the surface out of the weather in the first place. Less direct rain and sun exposure means less wear on the coating, whether it’s a fixed awning or a full roof extension over the entry. I go into that side of things in my porch awnings and roof extensions guide, if you’re weighing whether coverage is worth it for your situation.
When to Go Commercial-Grade on Anti-Slip Deck Coatings for Seniors
Products like Tuff Grip are epoxy-based anti-slip deck coatings for seniors. That’s why they show up so often in commercial work: HOAs, hospitals, anywhere with heavy public foot traffic. Epoxy is harder and more durable than acrylic paint, and it bonds to just about anything as long as the surface is prepped and cleaned first. It also costs more than your other options.
As a homeowner, you don’t need this unless you specifically want that level of durability, or your property genuinely sees hospital-level traffic. It’s a great product. It’s just not a requirement for most homes, and there are cheaper options that work fine for typical residential use.
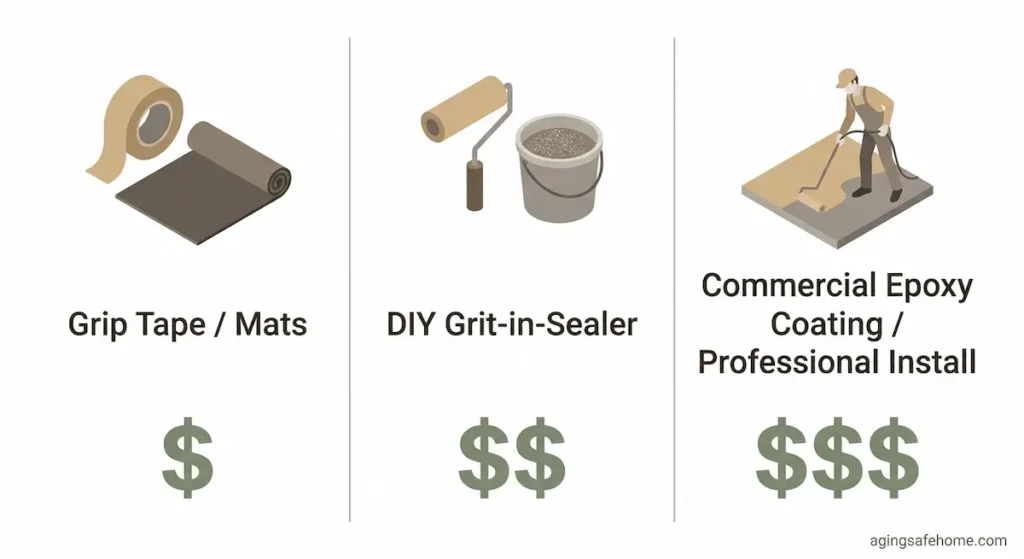
In rough order of cost, from least to most: grip tape and mats are your cheapest entry point. DIY grit-in-sealer comes in above that. A dedicated commercial-grade epoxy coating or hiring a professional to do the work sits at the top end. Where you land depends on your specific situation: your climate, how much traffic the surface gets, and what you’re trying to accomplish. I won’t throw out dollar figures here, because what this costs in your area, on your specific job, varies too much for a number to mean anything useful. Talk to your contractor about your specific property and your aging in place goals.
Concrete and Masonry
For new concrete, the best fix is also the simplest: a heavy broom finish at the time it’s poured. That texture is built in from day one and doesn’t wear off the way a coating can. This same finishing principle applies to any poured concrete pad, not just decks and walkways — including a pad built specifically for outdoor seating. A smooth-troweled finish looks nice but gets slick fast once it’s wet.
If you’re working with concrete that’s already down and already slick, you have two real options. You can do a concrete overlay finished with a heavy broom texture, or apply a concrete paint with a non-slip additive built in. These are made specifically for concrete floors, different from the wood products above.
Whatever you use on concrete, follow the process in order:
- Pressure wash and clean the surface
- Use the specific cleaner the manufacturer recommends
- Apply the primer the manufacturer specifies
- Apply the paint or coating
Do not skip the primer. That step creates the actual bond between the surface and the coating. It’s the step I see people skip most, because it feels optional. It isn’t.
One more warning on concrete: if you put paint or sealer down without a non-slip additive mixed in, you’ve made the surface slicker than before you started. And if you use epoxy on concrete, it has to be a non-slip epoxy. Regular epoxy on a walking surface turns it into an ice rink.
Wood: Same Process, Same Rules
The prep sequence on wood follows the same logic as concrete:
- Pressure wash and clean the surface
- Use the manufacturer’s recommended cleaner
- Prime
- Paint or coat
The mistake I see most on wood is timing. People pressure wash, don’t let the wood fully dry, and start painting over damp lumber. Moisture and paint do not get along. That paint job will bubble and peel. Same problem with brand-new treated lumber. If it’s still green, it isn’t dry yet, and painting over it now just means redoing it later.
Composite Decking: A Different Set of Rules
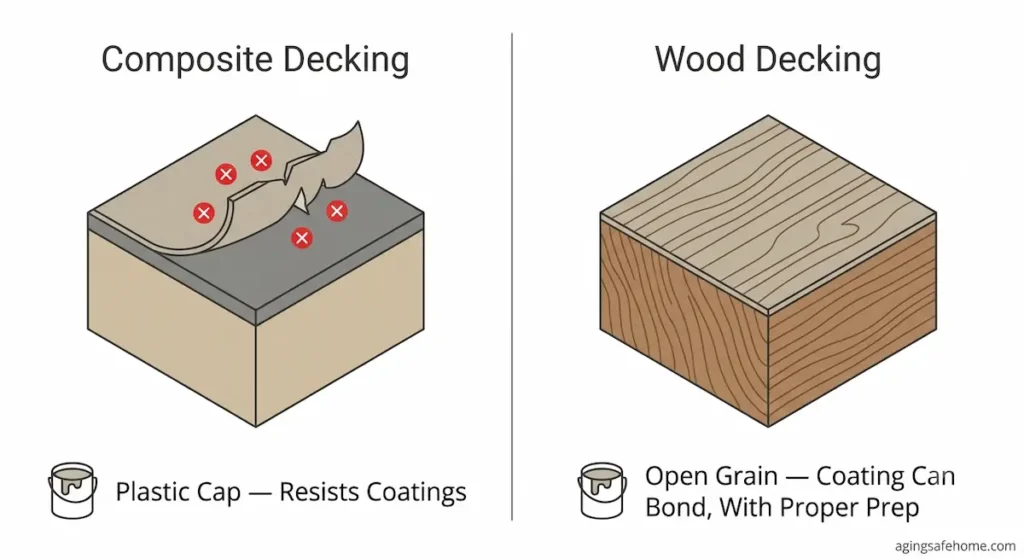
Composite decking plays by its own rules here, and it trips up a lot of homeowners. Composite boards have a plastic outer cap designed to resist moisture and stains. That’s great for durability, but it also means most standard paints and sealers won’t stick to it well.
Composite also expands and contracts with temperature swings more than wood does. A hard, rigid coating like epoxy can crack and flake off along the board joints within a season, even if it went on perfectly.
If you have composite decking and want to add traction, a standard paint or sealer usually isn’t your best bet unless you use a bonding primer made specifically for plastics and composite materials. Even then, it’s fighting the material’s design. For composite, I lean toward mechanical solutions instead: screw-down rubber treads, aluminum anti-slip stair covers, or textured composite designed with traction built into the board itself. These hold up far better long term than trying to coat a surface engineered to resist coatings.
Grip Tape and Mats
Grip tape fails for the same reason paint fails: a dirty or improperly prepped surface. If you don’t clean it right first, it’s coming back up.
I’ve also seen it fail a different way. Someone paints the surface, doesn’t let the paint fully cure, then applies grip tape over it. The tape sticks fine to the paint, but the paint never actually bonded to the wood or concrete underneath. So the paint lifts, and takes the tape with it. Piling one fix on top of a bad foundation just gives you a bigger pile to deal with later. Sticking tape onto a surface that isn’t properly bonded isn’t the fix.
Between grip tape and rubber mats, I lean toward screw-down mats over the self-adhesive kind. Adhesive is a chemical bond, and it depends on every prep step being done exactly right. A screw-down mat is a mechanical bond. It doesn’t rely on adhesion at all. That mat isn’t coming up unless the screws do.
One caution either way: grip tape and mats can become their own trip hazard if not installed correctly. And if you use rubber mats in direct sun, just know they’ll get hot.
Winter brings its own set of problems for all of these surfaces, from ice buildup to how you clear snow without damaging the coating underneath it. That’s a big enough topic that it deserves its own article, which I’m planning for this series. For now, just know that whatever surface you choose needs a little extra care once the temperature drops.
Pool Decks and Wet-Constant Areas
Areas that stay wet most of the time, like a pool deck or hot tub surround, generally follow the same playbook as the rest of this article. There’s one extra option worth knowing about. Non-slip coatings made specifically for pool decks, like Cool Deck-type coatings, are elastomeric paints that are both non-slip and reduce surface temperature. Worth looking into if you have a wood pool deck that bakes in direct sun all day.
Don’t Forget Where the Eye Needs Help
Traction solves the physical slipping problem, but it doesn’t solve everything. A uniform coat of gray anti-slip paint or a clear anti-slip sealer can make an entire deck or stair look like one flat plane. For seniors with vision changes, that can make it hard to tell where a step tread ends and open space begins. I talked about contrasting nosing strips and visibility on stair edges in more detail in the steps article, and it’s worth a look if your project includes stairs.
Lighting plays into this too. A good coating on a dim staircase still leaves you guessing where each step is. If your outdoor lighting hasn’t been updated in a while, it’s worth reading alongside this one.
Making the Call: Coat It or Replace It?
For wood, the tell is rot. If the wood underneath is deteriorating, no coating fixes that. It needs to be replaced, not painted over.
For concrete, it’s cracking or chipping. A coating on top of a failing surface is a temporary patch, not a fix.
Beyond that, it comes down to the specific person and property. This is the same conversation I have on every project: what’s your budget, what’s the most important thing that needs fixing first, and what’s your vision for the space? If someone needs a full wood porch rebuild but the budget’s tight, sometimes the answer is: we have to replace the porch, that’s not optional, but we don’t have to make the whole thing non-slip today. We focus the anti-slip treatment on the stairs and the main walkway from the door first and phase the rest in later. This kind of phased approach is common in aging in place projects, where safety and budget both matter. I go into a lot more depth on how to sequence a project like this in my phased remodeling guide, if budget is the thing driving your decisions right now.
That leads into something I see missed constantly: people cover their porch, but they don’t cover the stairs. Nine times out of ten, the staircase is where you’re actually going to get hurt, and it’s the one thing left exposed to the weather. If you can only cover one part of the exterior, cover the steps and main walkway.
FAQ: Anti-slip Deck Coatings for Seniors
How long does an anti-slip deck coating last?
It depends on the product. DIY grit-in-sealer jobs usually need to be redone every 1 to 2 years. Premade commercial anti-slip coatings are typically rated for 2 to 3 years. Nothing here is permanent. All of it wears down with foot traffic and weather. The real question is how fast.
Can I put an anti-slip coating on composite decking?
Not easily. Composite decking has a plastic outer cap that resists most standard paints and sealers. A bonding primer made for composite can help, but you’re still fighting the material’s design. For composite, mechanical options like screw-down rubber treads or aluminum anti-slip stair covers usually hold up better than a coating.
Is epoxy or acrylic better for a senior’s deck or porch?
Epoxy is harder and more durable, which is why it shows up so often in commercial settings. For a typical home, you don’t need that level of durability unless your property gets unusually heavy foot traffic. An acrylic paint or stain with anti-slip additive is usually enough, and it costs less.
Is grip tape or anti-slip paint better?
Both work if they’re installed correctly. Grip tape and adhesive products depend entirely on a clean, properly prepped surface underneath, or they’ll peel up. Screw-down mats and treads use a mechanical bond instead of adhesive, which tends to hold up longer with less risk of failure.
Can I use a regular deck sealer and just add grit myself?
Yes, as long as you use a film-forming sealer, not a penetrating one. Film-forming sealers, like acrylic or polyurethane, sit on top of the wood and hold the grit in place. A penetrating sealer soaks into the wood and won’t hold texture on the surface
Do anti-slip coatings work on bare feet, or just shoes?
It depends on the grit. Coarser, heavier grit gives great traction for boots and shoes but can feel rough on bare feet. If bare feet are part of the picture, like walking out to a pool, ask for a finer grit or polymer-based additive instead of the coarsest option available.
What’s the best anti-slip deck coatings for seniors with a wood deck?
It depends on the look you want. If you want a painted look with traction built in, a hard anti-slip deck coating like Tuff Grip, Behr, or Valspar’s textured deck paint works well. If you want to keep the wood grain visible, a semi-transparent stain followed by a separate anti-slip sealer with grit added is the better route. Either way, prep is what makes it hold up: clean, dry wood and a properly primed surface matter more than which brand you choose.
Bottom Line
None of this is one-and-done. Grip tape, mats, paint, grit additives, all of it wears down eventually. The only difference is how fast. What actually determines whether a slip-resistant surface holds up isn’t the product you buy. It’s whether the prep was done right before it went on. Clean it, use the right cleaner, don’t skip the primer, let it dry completely, and match the product to the surface you’re actually working with. Get that right, and whichever option you choose, paint, stain, epoxy, tape, or mats, it will do its job.
If you’re working through a full aging in place plan for your home and want a place to start, grab our free home safety checklist and walk through it room by room, inside and out.